
School-aged kids will create unique art with markers in this fun project. This simple technique can easily be used at home or in the classroom.
Washable MArkers
Washable markers are a staple in any kid’s art box. Markers are a great way to create bold colors and they are easy to clean up afterwards. In this project, we will use their ability to flow with water to create a unique watercolor style project.
Related: Create a more abstract Watercolor Design with markers in this project.
Supplies Needed to Make this Marker Painting Art Project
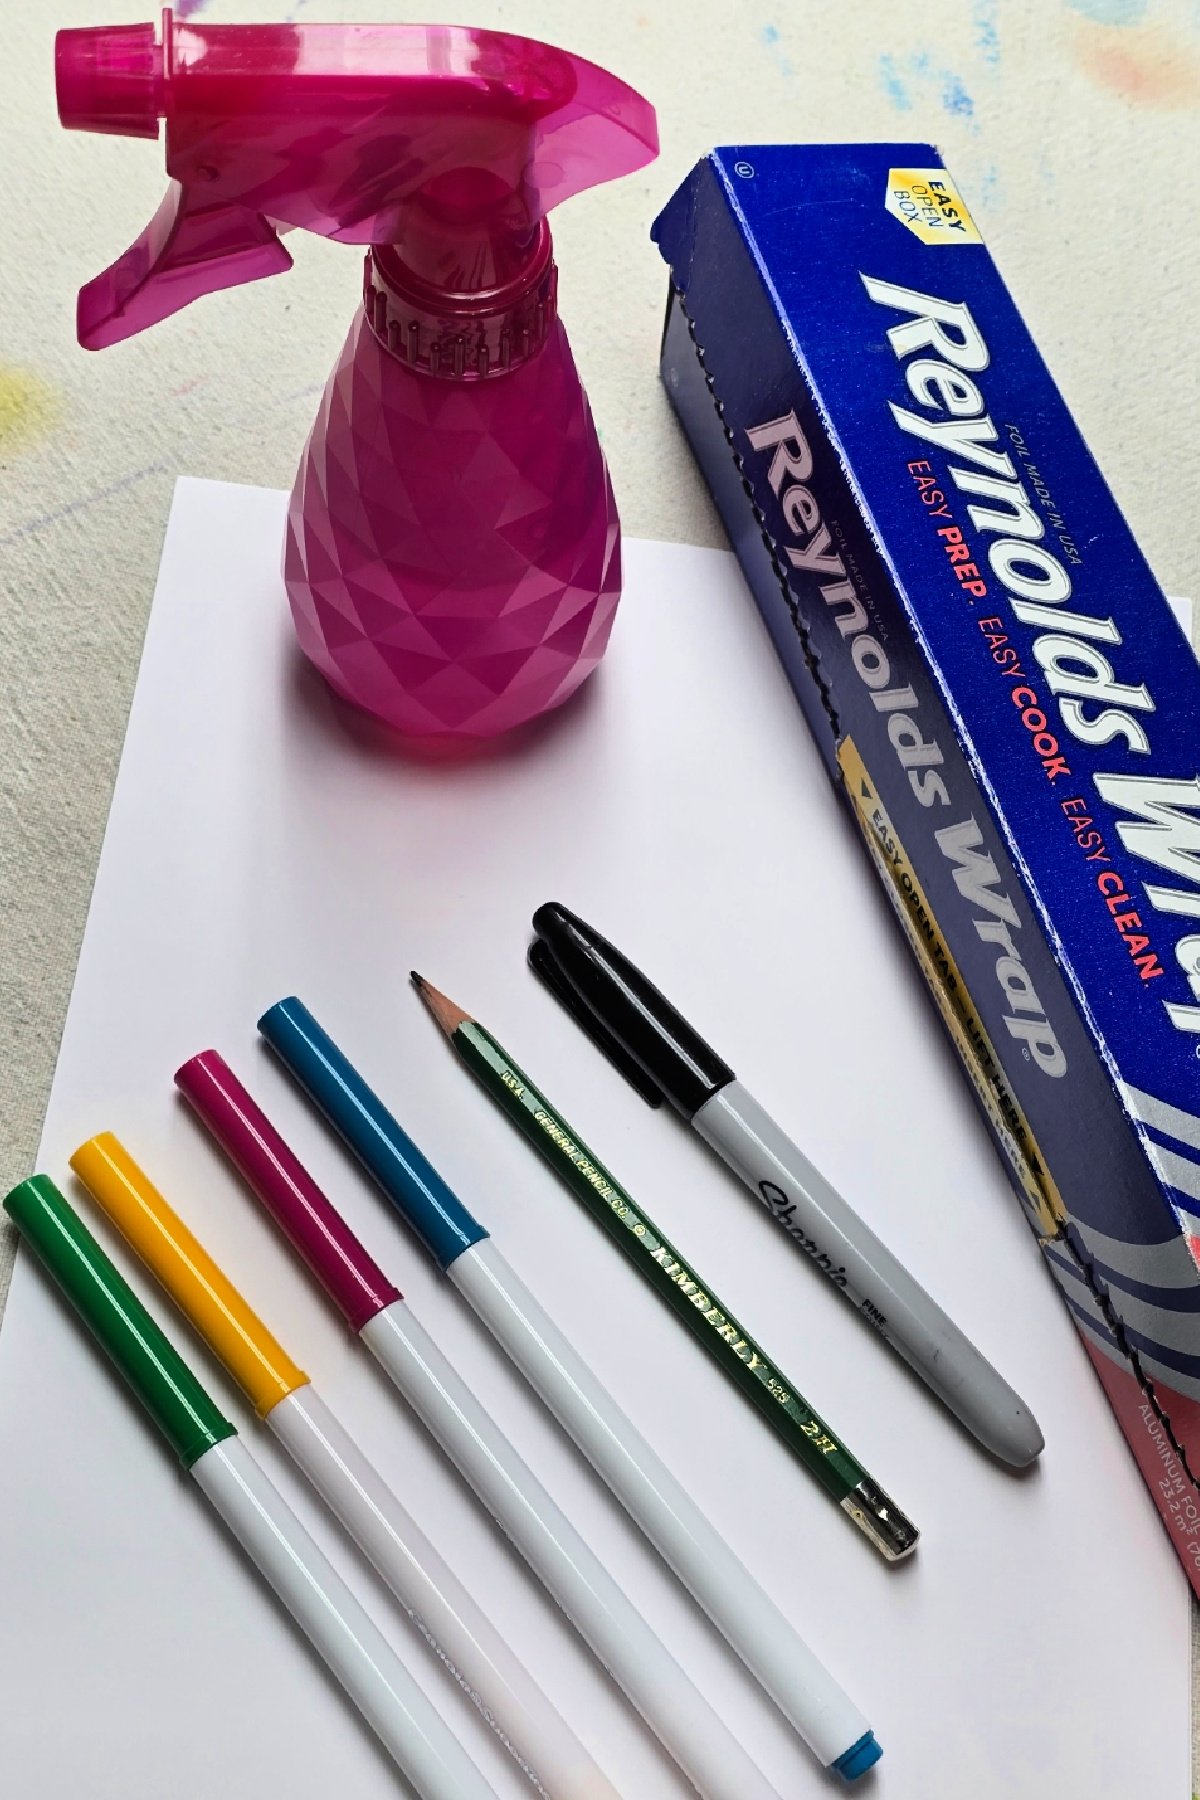
- Cardstock
- Aluminum Foil
- Washable Markers
- Permanent Marker
- Dull Pencil
- Spray Bottle with Clean Water
Directions to Make A Marker Painting
Step 1
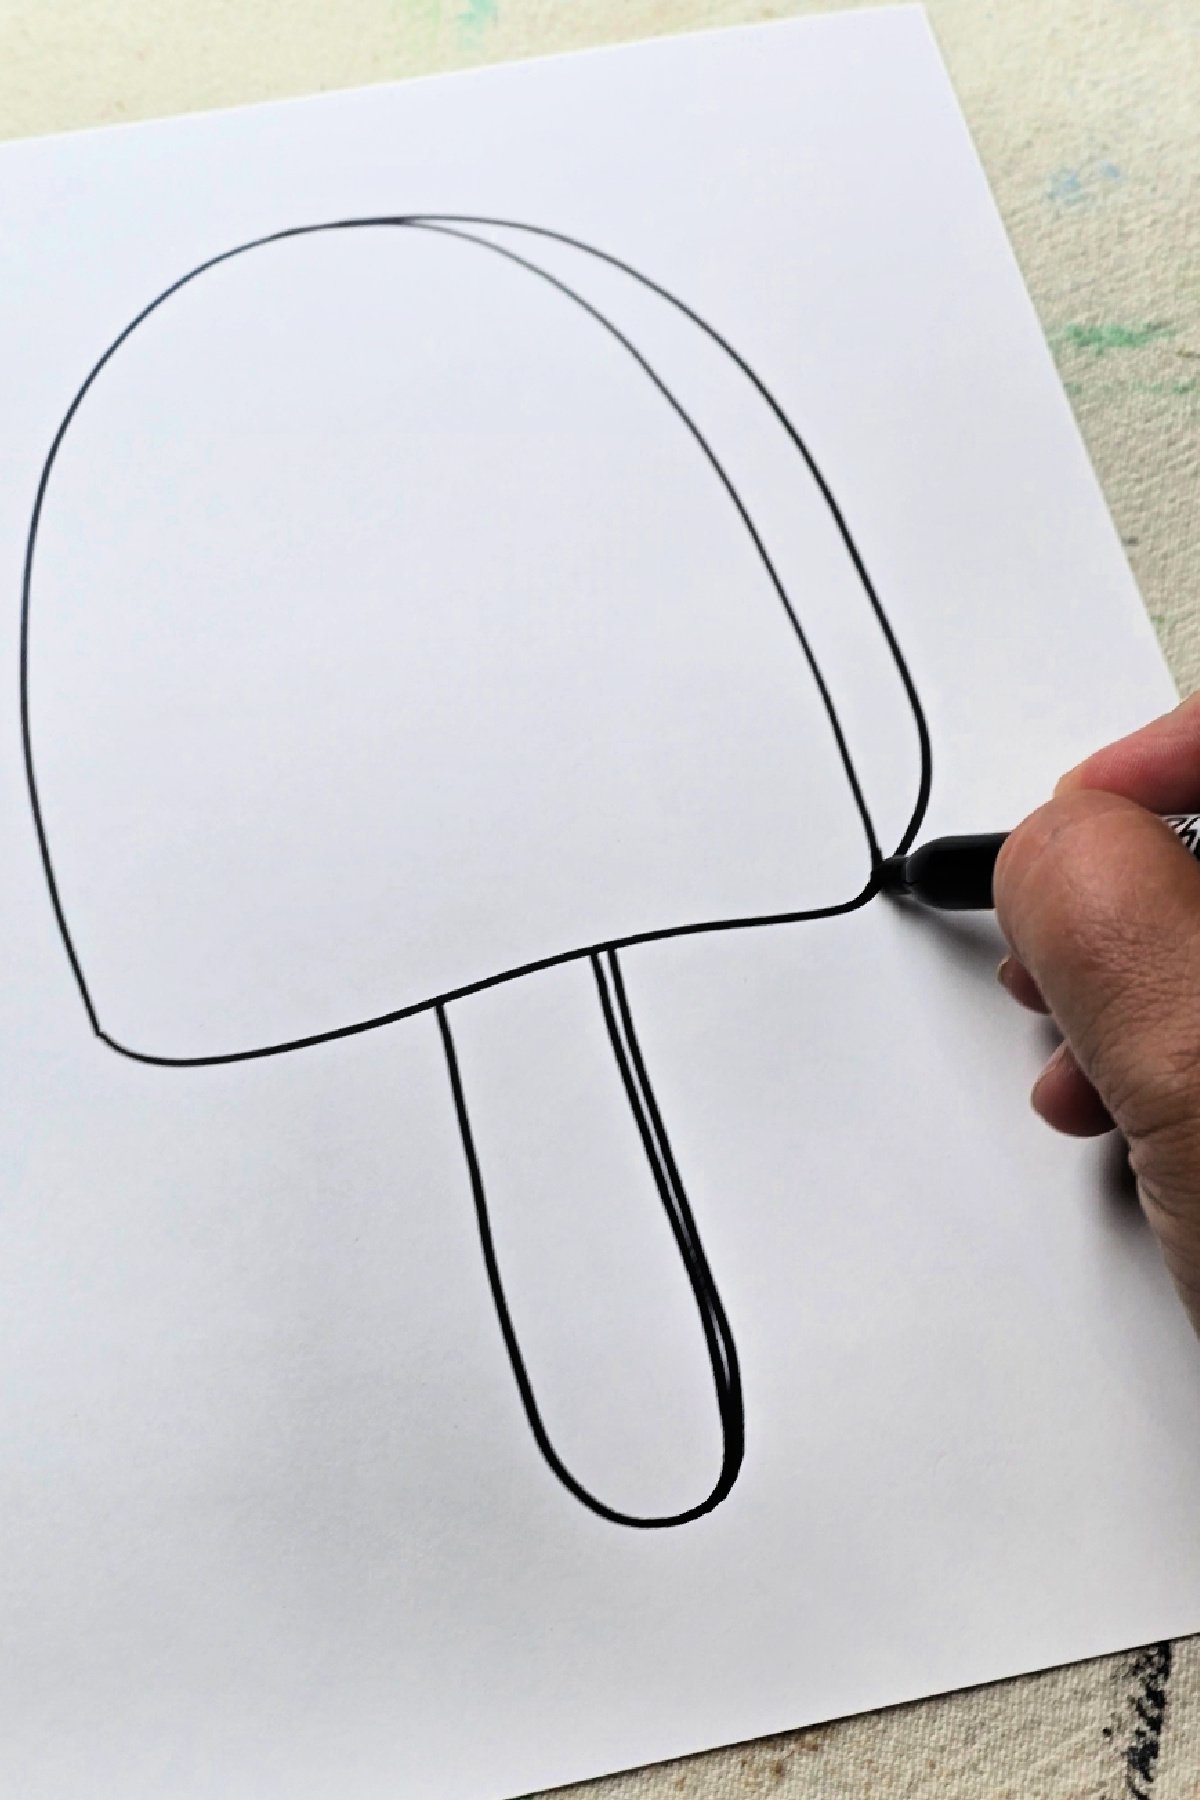
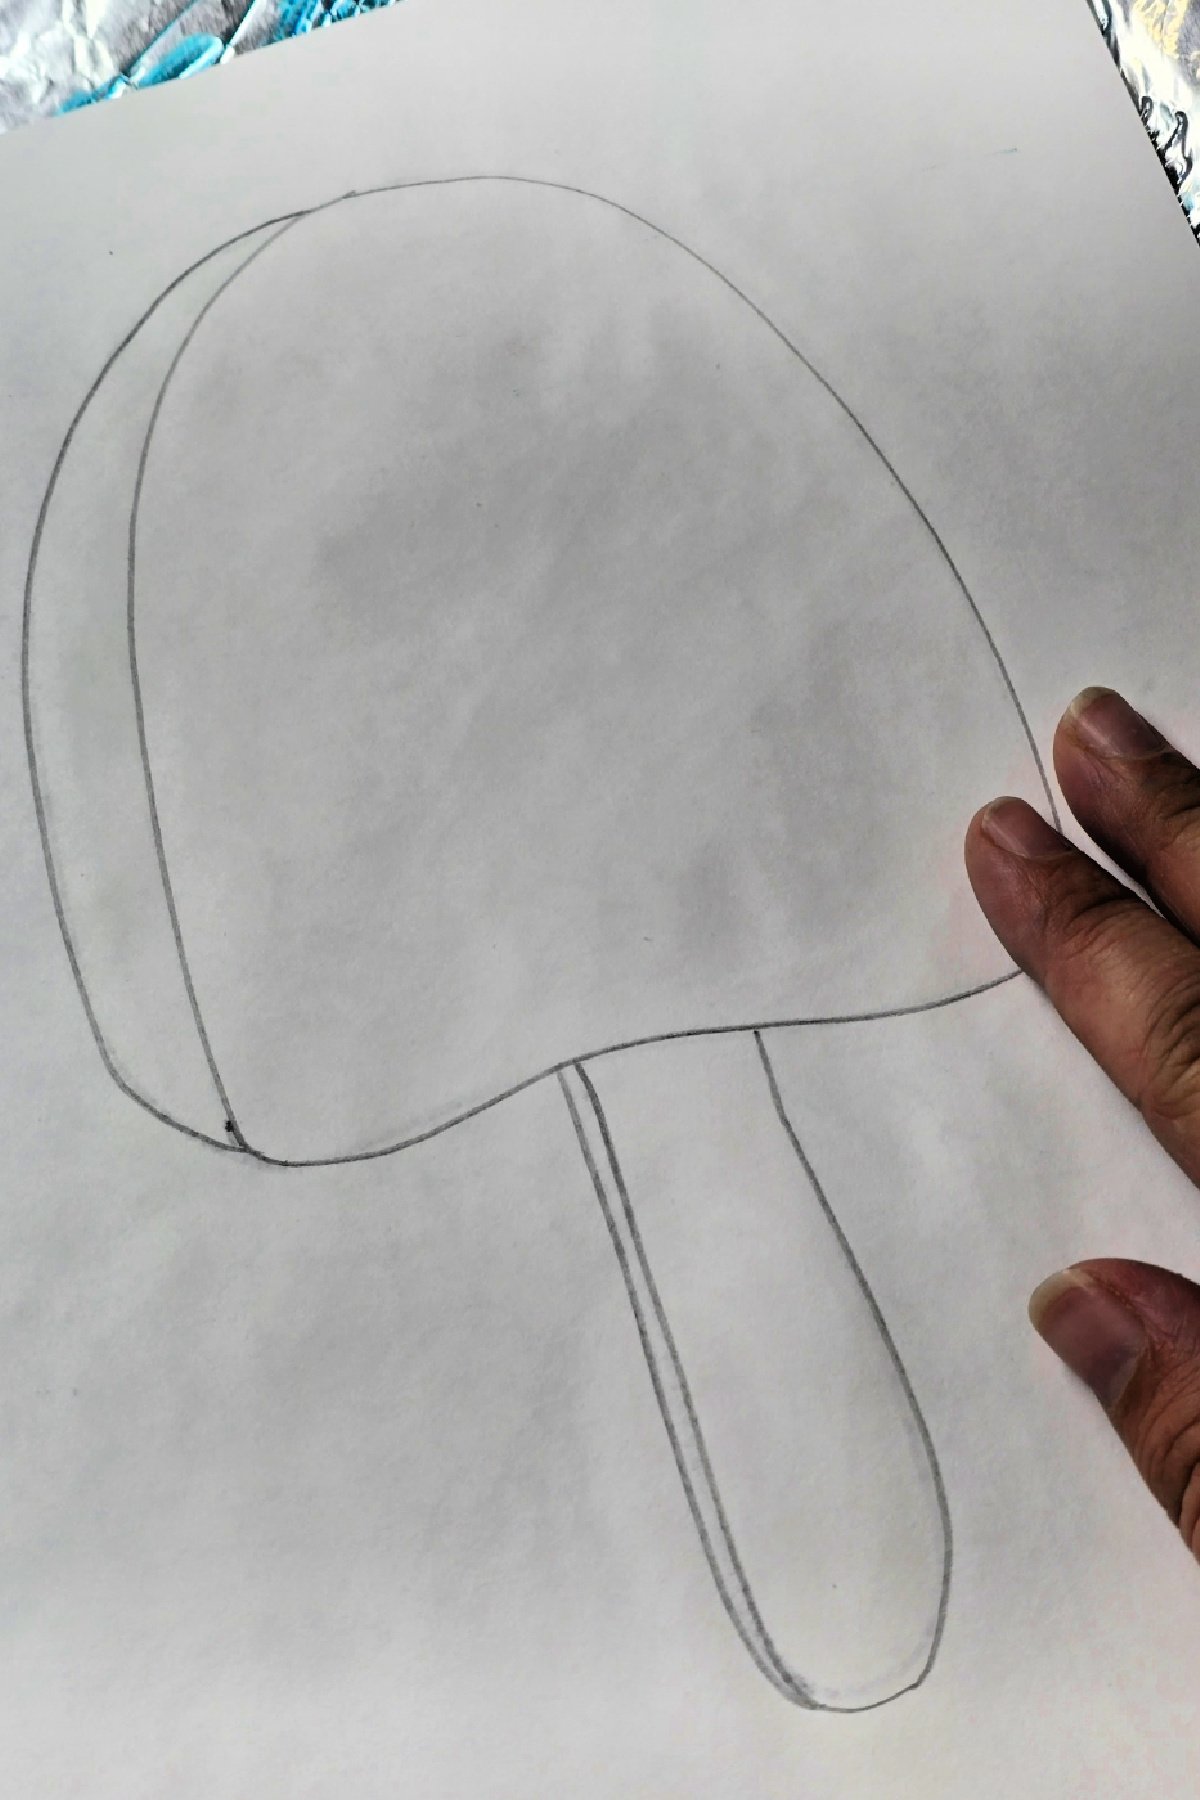
First, use the permanent marker to draw an outline of your design on paper.
Step 2
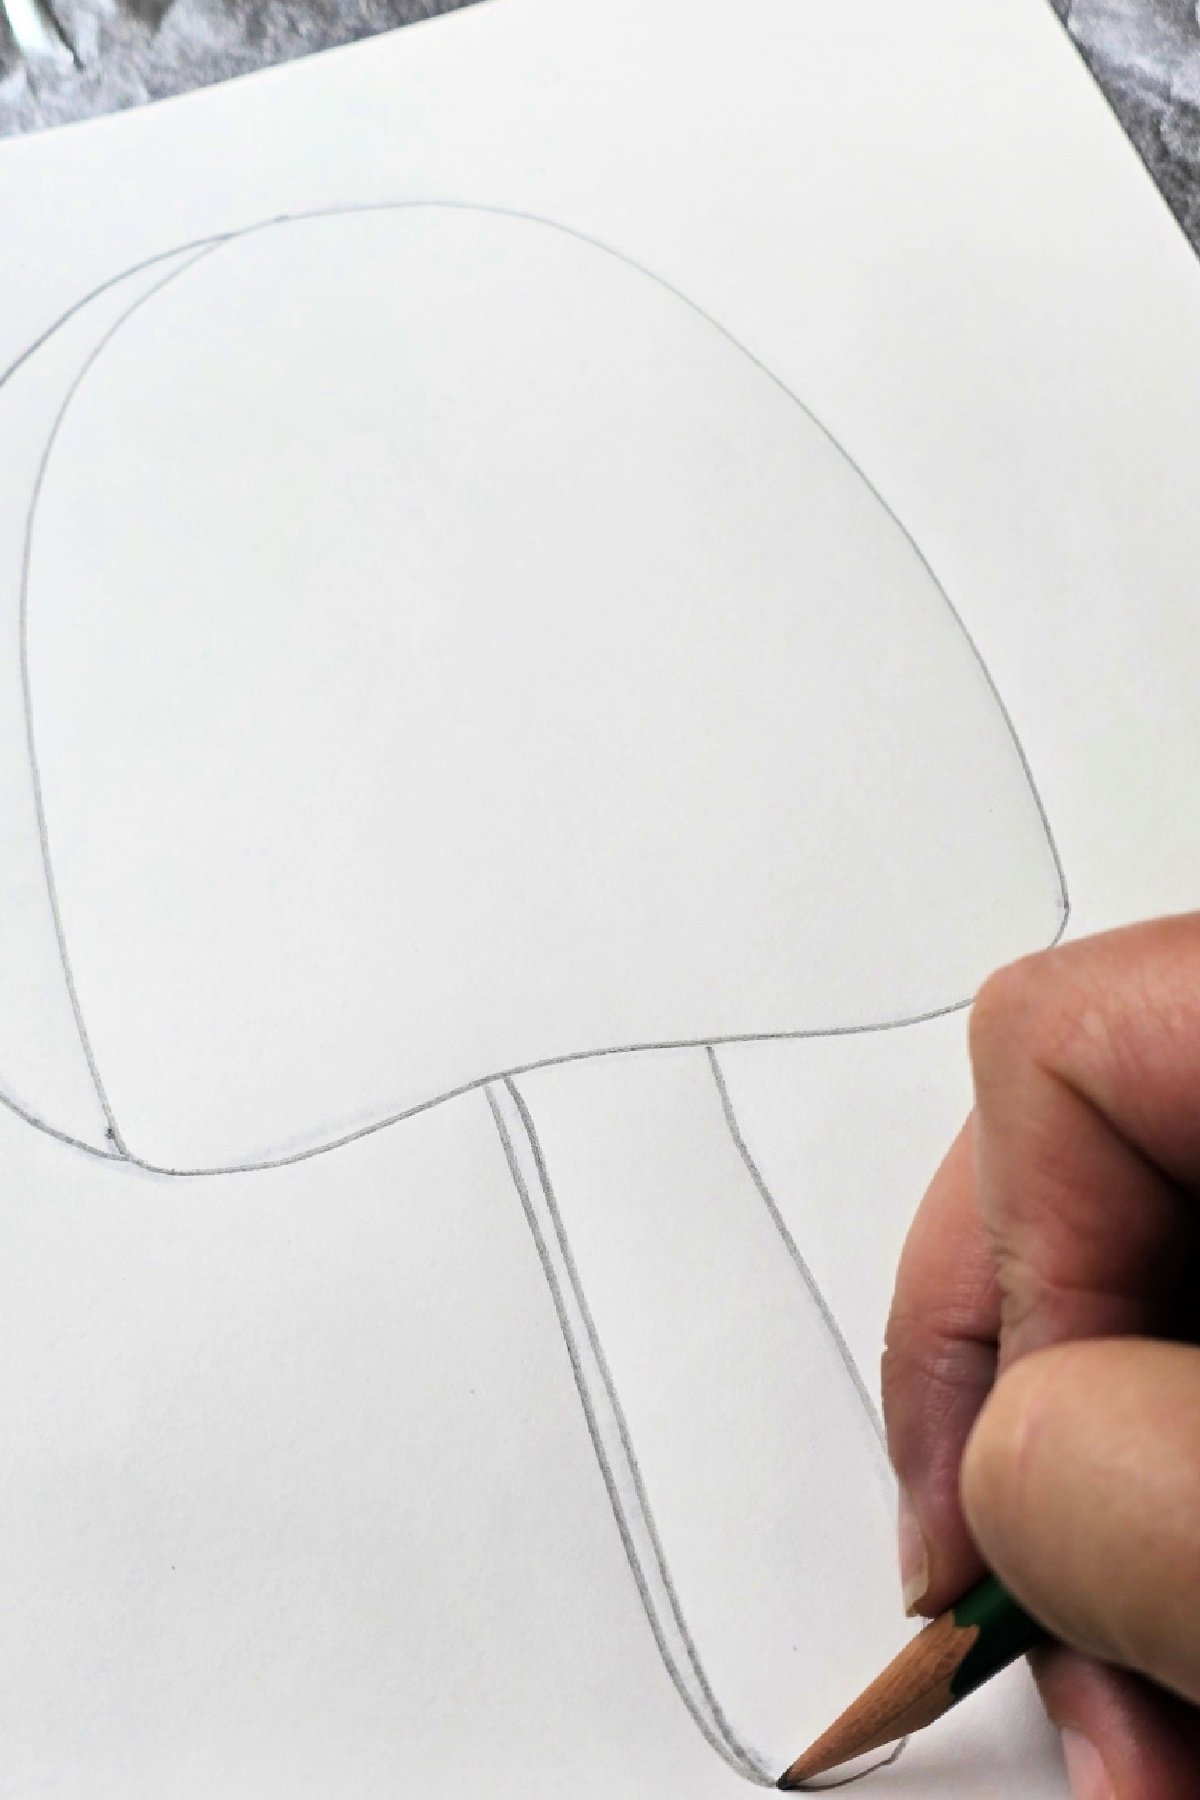
Next, flip the design paper over and place it on top of a piece of aluminum foil. Use a dull pencil to trace over the permanent marker design that is visible through the paper.
Step 3

Then, use the washable markers to color the design that has been transferred onto the aluminum foil.
Step 4
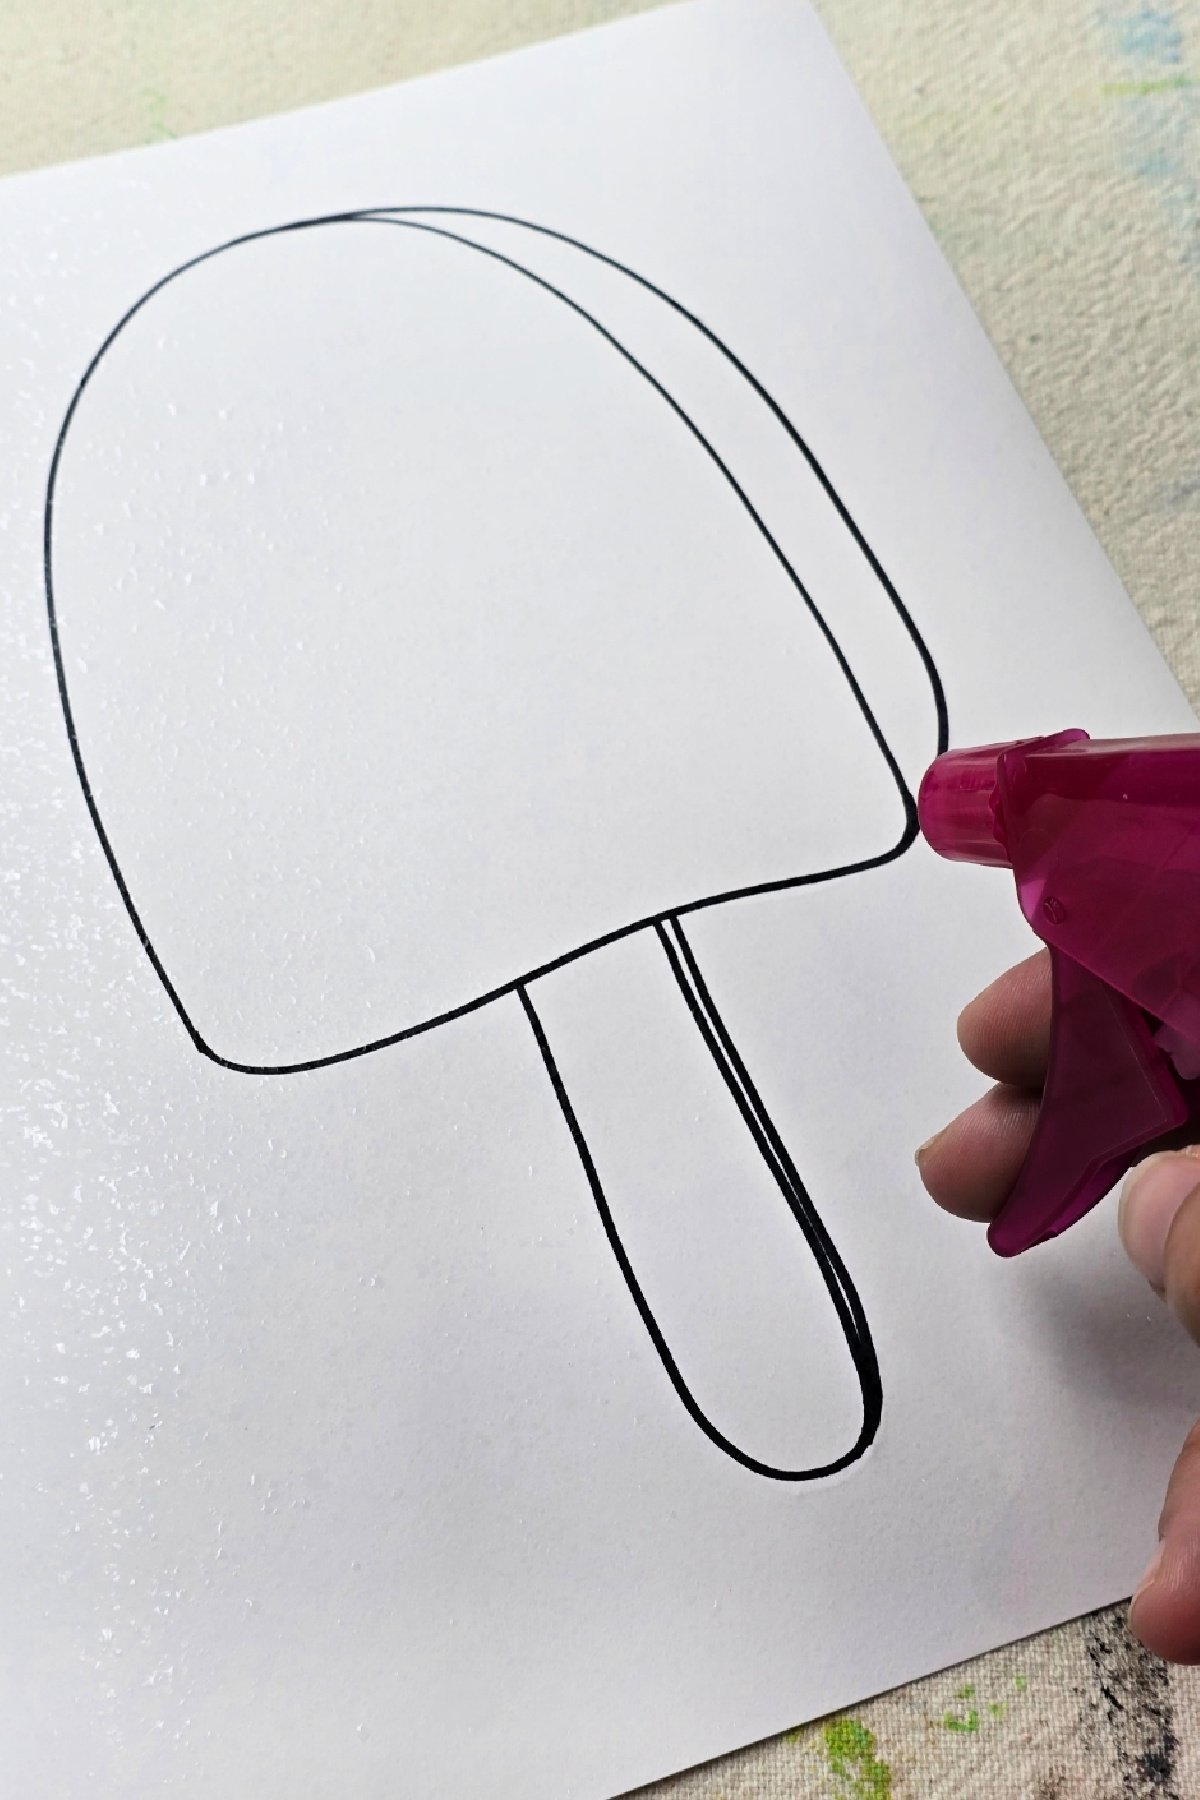
After you’ve colored the aluminum foil, lightly spray the piece of cardstock (permanent marker side) with water. The more water you add to the paper, the more the marker ink will bleed and blend in the next step.
Step 5
Finally, press the wet paper onto the colored aluminum foil. Move your hand around the paper to make sure the entire surface is firmly pressed against the foil.
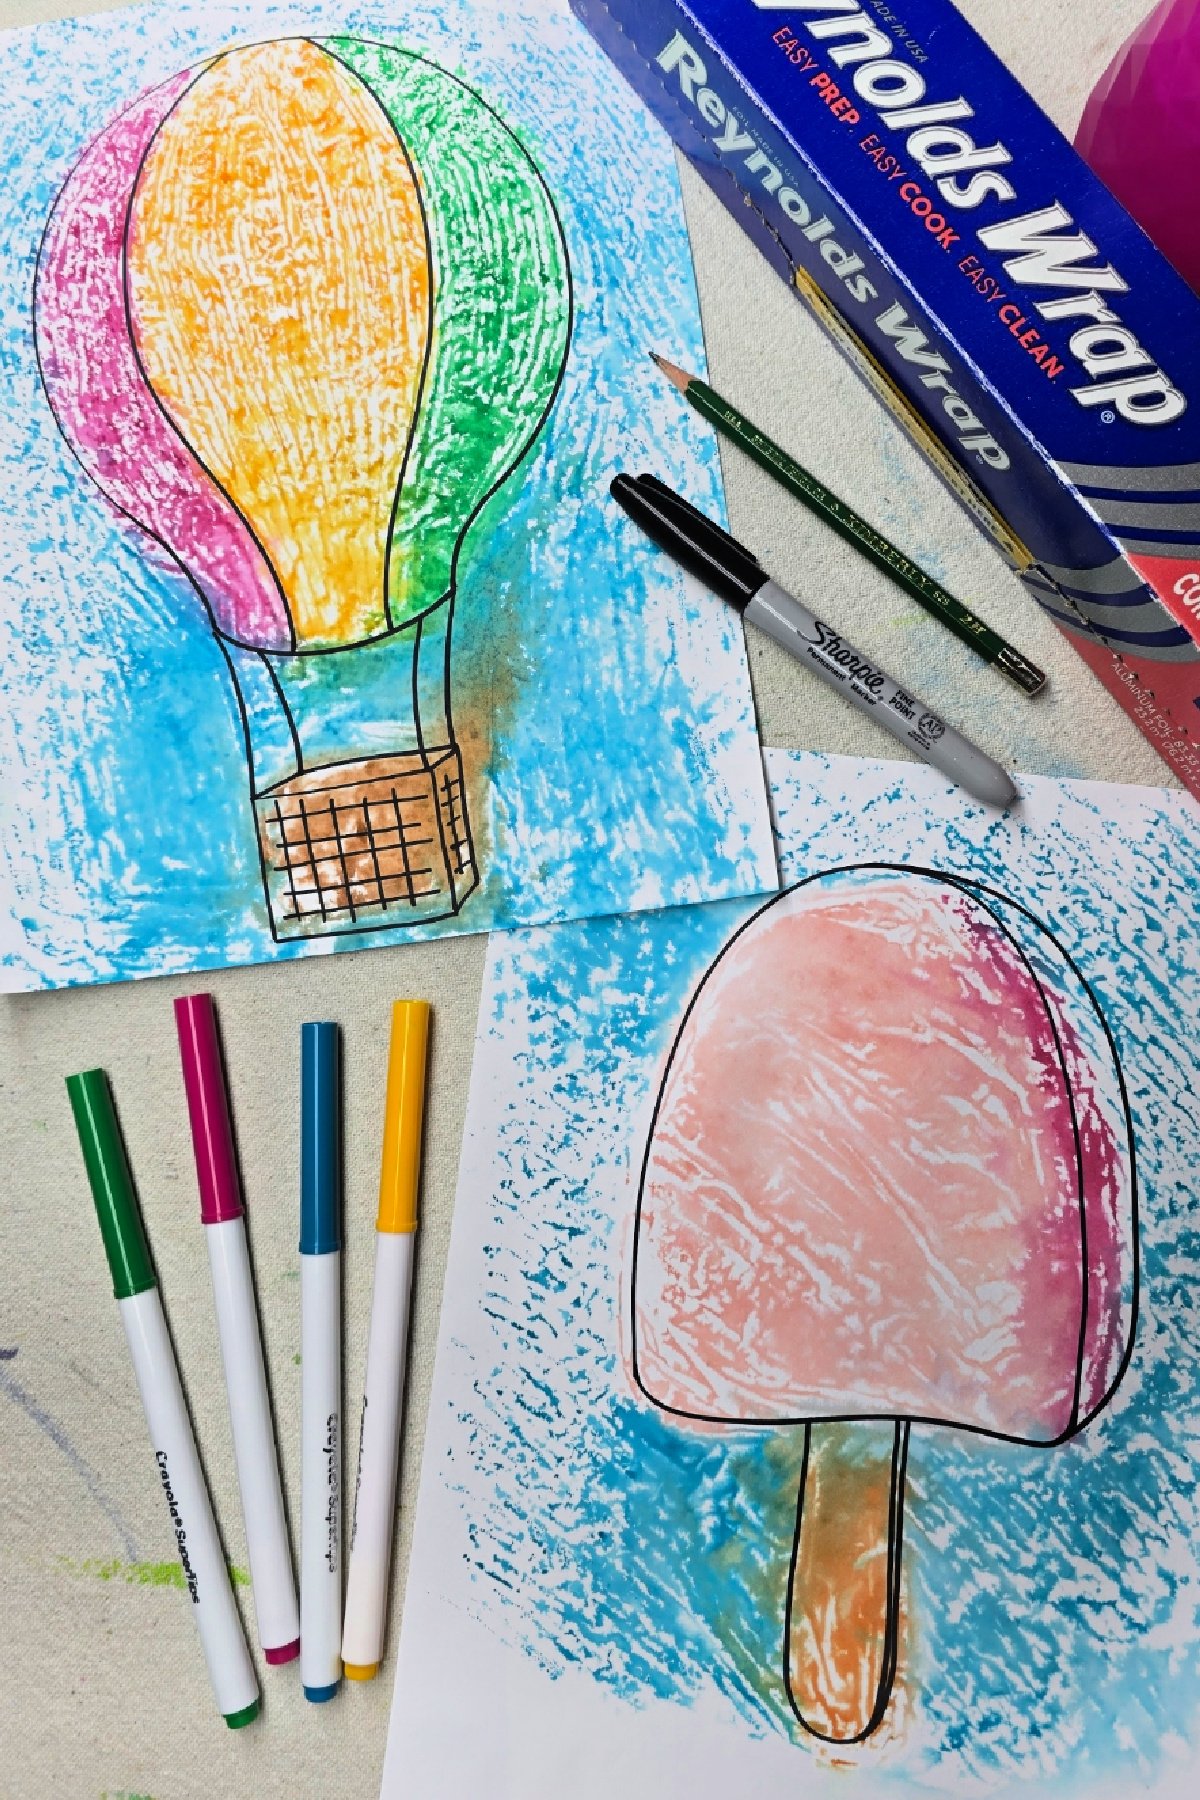
Finished Marker Painting Art Project
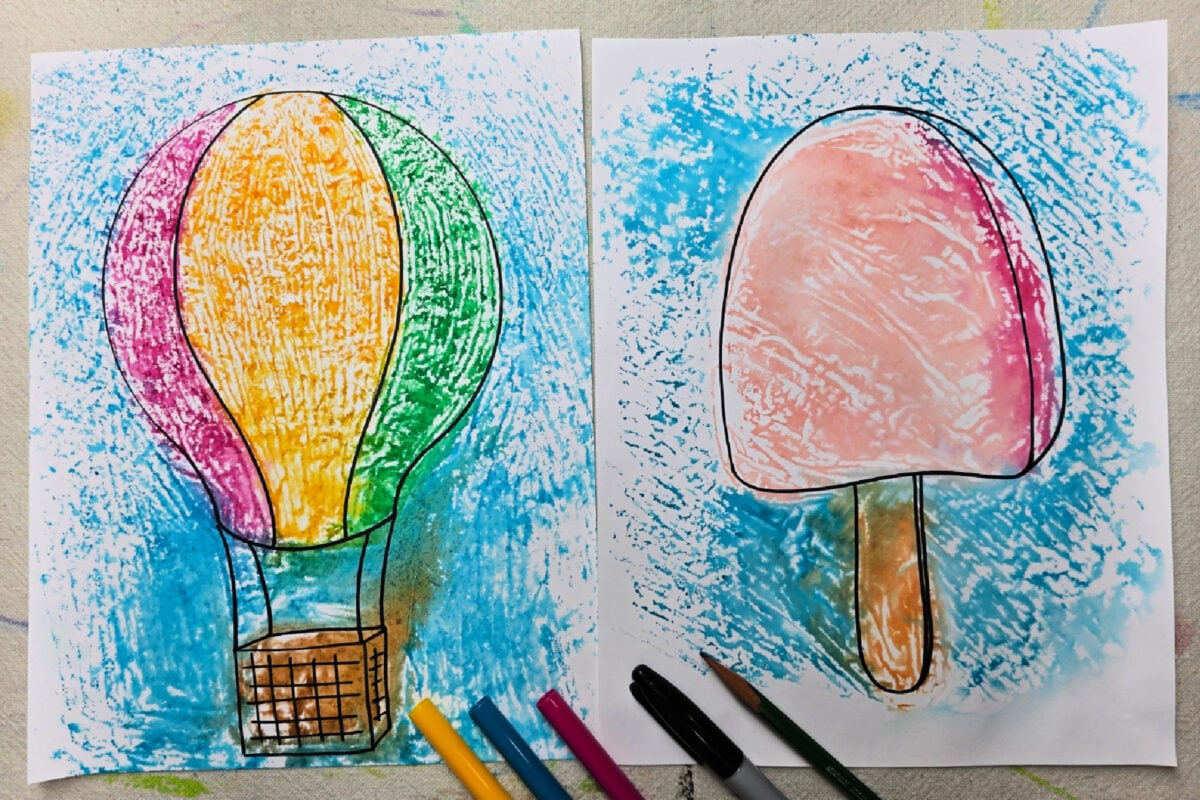
I love the unique designs created with this technique. Since these projects are made on paper, they can easily be framed, clipped, or displayed in your preferred style.
Our Experience Making this Marker Painting Art Project
This is such a fun, quick, and easy project that gives unique results. We have tried various methods on what to first apply the marker to: aluminum foil (as mentioned in these instructions), plastic wrap, the smooth surface of a table, and so on. We liked the results of the foil best and the bright bold colors it left on the finished painting.
Prep Time
5 minutes
Active Time
10 minutes
Total Time
15 minutes
Difficulty
Medium
Estimated Cost
$1
Tools
- Washable Markers
- Permanent Marker
- Dull Pencil
- Spray Bottle with Clean Water
Instructions
- Use the permanent marker to draw an outline of your design on paper.
- Flip the design paper over and place it on top of a piece of aluminum foil. Use a dull pencil to trace over the permanent marker design that is visible through the paper.
- Use the washable markers to color the design that has been transferred onto the aluminum foil.
- After you’ve colored the aluminum foil, lightly spray the piece of cardstock (permanent marker side) with water. The more water you add to the paper, the more the marker ink will bleed and blend in the next step.
- Press the wet paper onto the colored aluminum foil. Move your hand around the paper to make sure the entire surface is firmly pressed against the foil.
Notes
Marker Painting Art Variations
- Review color theory and notice how colors mix together when the various marker inks becomes wet.
- Practice coloring on plastic wrap, a sealed table top, or other smooth surfaces to see how the end results vary.
- Alter project to fit any seasonal or holiday theme.
Marker Painting Art Variations
- Review color theory and notice how colors mix together when the various marker inks becomes wet.
- Practice coloring on plastic wrap, a sealed table top, or other smooth surfaces to see how the end results vary.
- Alter project to fit any seasonal or holiday theme.
Other Fun Marker Art Projects from Kids Activities Blog
Did your kids enjoy this marker painting project? What unique designs did they create?
Trending Products