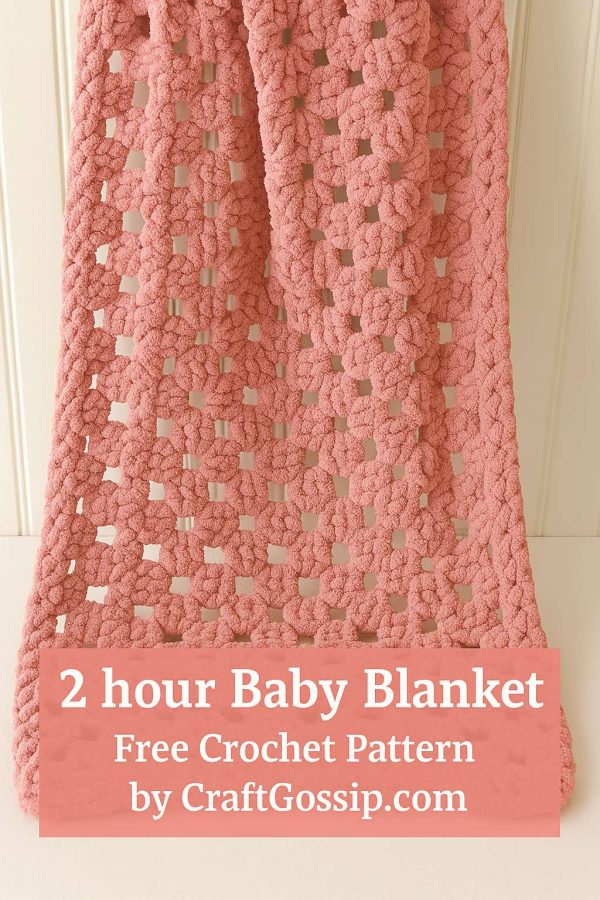

You know those moments when your yarn stash is giving you the side eye? That was me last weekend. I had a few big, squishy skeins of this soft blush pink yarn taking up space, and I decided it was finally time to turn them into something useful (and adorable). So I whipped up this 2 Hour Baby Blanket—all in one color, just to use up what I had on hand.
Even though I went with a solid shade this time (sometimes simple is soothing, right?), I’ve written the pattern to include color changes in case you want to spice things up. You can totally personalize it! Think:
-
Color 1: Center section
-
Color 2: Outer rounds
-
Color 3: Final border
This design works beautifully whether you go with a solid like I did, or play with bold combos for a striped or ombré effect. The chunky yarn makes it super fast to finish—seriously, you can have this done before your next episode ends. It’s perfect for a last-minute baby shower gift or to tuck into your “emergency gift” stash.
Whether you’re stash-busting like me or choosing your palette with purpose, this is one of those patterns you’ll come back to again and again.
Finished Size
What You’ll Need
- Yarn: Super bulky (approx. 48 yds per 100g ball)
- Color C: 2 balls for outer edge
- Hook: Size Q / 16 mm crochet hook (or whatever gets you the right gauge)
- Tapestry needle for weaving in those ends
- Stitch marker (optional but helpful)
Gauge
4 double crochets across and 2 rows tall should give you a 4″ square.
(Don’t skip the gauge check—it’s worth it.)
Stitches You’ll Use
We’ll also use a classic corner-to-corner granny rectangle approach, so get comfy with chaining and turning.
Color Striping Tip
No complicated color changes here—just crochet until your yarn ball is almost done (with about 6″ left), and then begin the next stitch using the new color. You can even crochet over the old and new ends to secure them neatly as you go.
Let’s Crochet the Blanket!
Start with Color A
Ch 15 to begin.
Round 1 (Right Side):
Work 2 dc into the 6th chain from your hook (those skipped chains count as your first dc + ch-2 corner).
Next, ch 1, skip 2 chains, 2 dc into the next chain—repeat this part twice.
In the very last chain: (2 dc, ch 2, 2 dc, ch 2, 2 dc).
Now turn and work along the other side of your starting chain:
Repeat ch 1, skip 2, 2 dc in next twice.
Then ch 1, skip 2, and finish off with (2 dc, ch 2, dc) into the next chain.
Join with a slip stitch into the top of that beginning chain.
Round 2:
Slip stitch into the corner ch-2 space, then ch 5 (this acts as a dc + ch-2), and work 2 dc into the same corner.
Then do: [ch 1, 2 dc into next ch-1 space] three times.
In the next 2 corners: (2 dc, ch 2, 2 dc) in each.
Then [ch 1, 2 dc in each ch-1 space] three more times.
Final corner: (2 dc, ch 2, 2 dc, ch 1, dc) in the corner ch-2 sp.
Join with a sl st to the 3rd chain of your initial ch-5.
Round 3 and onward:
Repeat the flow of the previous round: work (2 dc, ch 2, 2 dc) in each corner ch-2 space, and 2 dc in each ch-1 space along the sides.
Always separate clusters with a ch 1, and finish the last corner with a dc + sl st join.
Repeat Round 3 four more times, switching yarn color when a ball runs low (you’ll likely change at the end of rounds).
Final Round (Edging)
Use whichever color you’ve ended up with:
Sl st into the nearest corner ch-2 space, ch 1.
In each corner ch-2 space, work: (sc, ch 1, sc, ch 1, sc).
Then along each side: [ch 2, sc in next ch-1 space] all the way across.
Finish off by joining with a sl st to your first sc.
Finishing
Weave in your ends securely, trim any strays, and give it a gentle fluff. That’s it!
CraftGossip Tip
Don’t stress over counting every stitch. This pattern is super forgiving and grows quickly. You can even stash-bust with other jumbo yarns you have on hand.
Trending Products
