
In this article, I explain the blocking in technique, by defining its purpose and demonstrating how to use it to plan the placement of tone, colour, and composition in artwork. I refer to art history by looking at examples of unfinished paintings from the Renaissance to the pioneering approach of Cézanne. Through my demonstrations, I show how blocking in can speed up the art making process, in acrylic, oil, pencil, and pastel. Articles in the Painting Techniques series define the meaning and context of art making processes and give practical tutorials on how to work with them.

Blocking In Technique
Definition
‘Blocking in’ refers to media that has been applied broadly with minimal detail, to give the artist an idea of the placement, form, tone, size, or colours of the imagery. A resolved artwork may be completely ‘blocked in’, or retain some areas from the blocking in stage. Although it more commonly functions as an initial underpainting or underdrawing that will later be developed further by the artist.
What is the Effect of Blocking In?
When you block in the early stages of an artwork, it provides a foundation to build from and allows for any necessary changes to be made to the work before it develops too far. It can be frustrating when you focus on one area of a painting, and realise later that the placement or size of something else is wrong. Blocking in may resolve this issue before it arises since you immediately get a clear idea of the entire artwork before you commit to any level of detail.
Blocking in also allows artists to let specific areas of this broader underpainting show through, which can add appealing visual complexity to their work. When a resolved painting is completely blocked in, without adding subsequent layers, it conveys that the painter is decisive and spontaneous in their mark-making. Blocking in could be as simple as adding a solid colour oval where a face will be, or as developed as blocking in the different planes of that face. All that matters is that the blocking in process helps the artist to progress the work successfully more quickly, by making their decision-making process immediately visible on the surface.
The History of Blocking In
Blocking in is tied to the history of underpainting, which originated in the work of the Old Masters. Tightly executed figure compositions required a methodical process, from applying the sketch to canvas, to thinly layering in tone and colour. In broad terms, adding areas of flat colour on top of the underpainting could be seen as the first example of blocking in.
Unfinished paintings give us revealing insights into the construction of historic artworks, as seen in the Salvator Mundi by Albrecht Dürer, which reveals a combination of his underdrawing, blocking in, and more developed paintwork. The underdrawing of Christ’s face is still visible, which has been painted over with a thin layer of Lead White. We see the most developed areas of painting in the folds of the fabric and the lower portion of his hair. Other than these areas, the painting remains in a blocked in stage. The placement of flat colour follows the boundaries of the underdrawing on the top of Christ’s hair, the pink which had begun to be applied to his neck and hands, and the blue in the centre of his robes.

Salvator Mundi, ca.1505
Albrecht Dürer
Oil on linden, 58.1 x 47 cm | 22.8 x 18.5 in
The Metropolitan Museum of Art
The style of painting that most people associate with blocking in today is much looser and less reliant on an underdrawing. In Western painting, the Post-Impressionist Cézanne can be considered the pioneer of building up form and space without drawing; solely relying on the placement of his colours in confident brushmarks. By abandoning the conventional academic process for making paintings, Cézanne’s new pictorial language aided a shift in art history and is seen as an essential step toward the later development of Cubism and beyond.
In his time, Cézanne’s experimental work was met with rejection and ridicule, and only gained some appreciation toward the end of his life. Today, the work may not seem so unusual, but paintings like The Bend in the Road marked a turning point. The way the colour is applied in patches dappled with light with the ground showing through, intuitively responding to the environment around him, is key to how many artists approach blocking in today.

The Bend in the Road, 1900-6
Paul Cézanne
Oil on canvas, 82.1 x 66 cm | 32.3 x 26 in
National Gallery of Art
Across the Atlantic, George Bellows – a young painter active toward the end of Cézanne’s life – became an admirer of his work. Bellows, an American Realist, was a key organiser of the famed 1913 Armory Show, which was the first major exhibition of Modern art in America of European painters. It introduced the American public to a new avant-garde of artists and movements that were mostly unknown to them, including Post-Impressionism, Fauvism, and Cubism.
Paintings by Bellows reveal some of Cézanne’s influence, combined with his love for sport and depicting the working class. In his painting Tennis Tournament – which is considered unfinished since there are some areas of canvas left bare with underdrawing visible – we can see the figures and the lawn have been blocked in and built upon, to varying levels of finish across the surface. This large-scale bird’s eye view achieved by selective blocking in, gives insight into Bellows’ method of working up his paintings.

Tennis Tournament, 1920
George Bellows
Oil on Canvas, 149.8 x 167.6 cm | 59 x 66 in
National Gallery of Art
Demonstrations of the Blocking In Technique for Painting
Blocking In with Oil Paint
For the first demonstration of blocking in, I wanted to work over an underdrawing like we see in Durer’s Salvator Mundi. Underdrawing traditionally would be applied by a few different methods – drawn with charcoal or chalk, transferred using a grid system, pouncing or tracing, or applied with a small brush wet with black pigment or ink. For my example, I used a water-based black paint, Vallejo Artist Acrylic Paint in Ivory Black, applied with a fine brush, on a Jackson’s Oil Paper Block. On top, I blocked in colours using Jackson’s Professional Oil Paint.

To start, I mixed some combinations of Transparent Red Oxide, Ultramarine Blue Red Shade, and Titanium White on my palette, giving me a base selection of colours to work from as I blocked them in.

Next, I blocked in the darkest areas of tone, and built towards the light, using multiple brushes to keep my different shades separate.

I picked out some stronger highlights to lift the planes of the face once I had blocked in most of the tones.

Finally, I quickly blocked in the background, shoulders and hair of the sitter, keeping them as brief as possible.

Tips: Blocking in with oil is most effective if you don’t over blend, or layer too many colours at once. Once the surface becomes too complex it advances quickly beyond blocking in toward the resolution of the painting. Keep this layer lean, and allow it to dry before progressing beyond the blocked in stage unless you are keen to finish the painting wet-on-wet or impasto.
If you want to work more quickly, this blocking in layer can be completed in acrylic paint, before painting over it in oil paint – just not the other way around.
Blocking In with Acrylic Paint
Next, I wanted to demonstrate blocking in without an underdrawing, more akin to Cézanne’s style of working, responding to a couple of plants in the studio. For this painting, I worked with Jackson’s Professional Acrylic Paint on a sheet of Jackson’s Acrylic Paper Block with a blue ground applied.
To begin, I prepared my surface by applying a mixture of gesso and French Ultramarine Blue and allowed it to dry.
Next, I blocked in the major shapes of the plant pots, to ensure I could fit everything in. I picked out the major midtones and shadows without worrying about texture or detail.

Next, I added the leaves, paying attention to the different tones and hues of green throughout them. Most of them are blocked in with just a few strokes.
I blocked in the sheet in the background by adding the shadows and allowing my ground to shine through for the lighter areas.

To finish, I blocked in some brighter highlights with a smaller brush, like the yellow on the edges of the leaves, and the highlighted rim of the pot.

Tips: After this blocking in stage is complete it’s helpful to leave the painting alone for at least a day and come back to it with fresh eyes to see how you feel about the colours and placement, and how much you may want to preserve from this layer. Some distance from artworks allows us to see them more objectively.
Demonstrations of the Blocking In Technique for Drawing
Blocking in isn’t solely a technique for painting, and can be applied to drawing practices too. Be it the arrangement of tone across a charcoal drawing, lightly applied shapes of coloured pencil to establish the placement of colours, or the first broader planes of a pastel drawing that will be developed later. For my examples, I’ll demonstrate blocking in tone with a black coloured pencil and a composition with soft pastels, although these methods can be interchanged with different drawing media. Here, I’ve used a Holbein Artist’s Coloured Pencil in black on a sheet of Jackson’s Snowdon Cartridge Pad.
Blocking In a Tonal Drawing
Sitting in front of my still life set up, I took some time to examine the areas of varying tones before starting, since my drawing won’t be relying on line to express the subject.
I worked on blocking in my first tone, starting lightly, and leaving only the bright highlights blank.

Next, I worked up a midtone, blocking in broad shapes without worrying about refining areas like the little reflected details in the glass.

To finish, I blocked in my darkest tones. The drawing is now ready to develop further with areas of specific details and intentionally placed lines, or it could be adjusted with a rubber to change anything before committing to the composition.

Tips: Try to start lightly so that if you make any mistakes you can more easily erase and amend your drawing. If you start with the darkest areas and later want to shift the composition, the tone may be too difficult to completely remove with your rubber.
Half closing your eyes whilst making a blocked in tonal study can help you to identify the tones in broader shapes, without getting caught up in specific details.
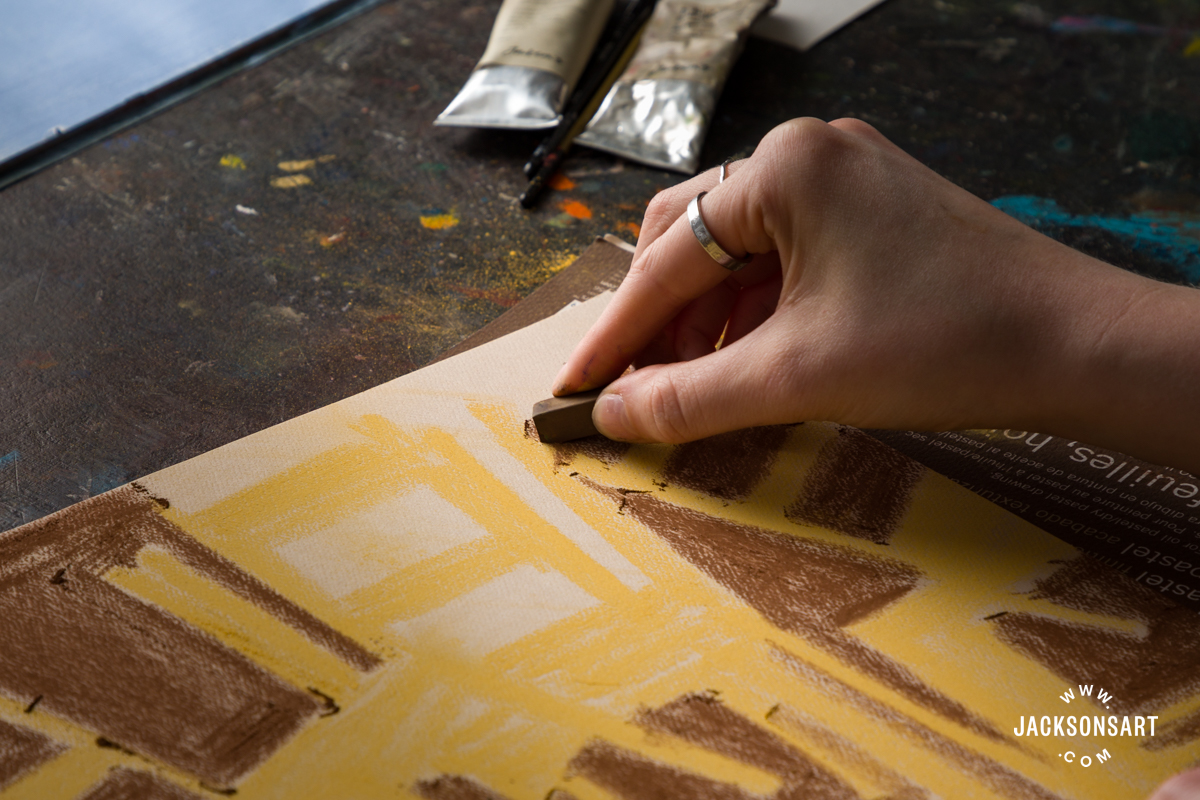
Blocking In a Composition in Pastels
Working from an imaginary composition of chairs in a space, I blocked in their basic shapes using a set of Jackson’s Soft Pastels, by holding the pastels on their side to apply them in broad light strokes on pastel paper.
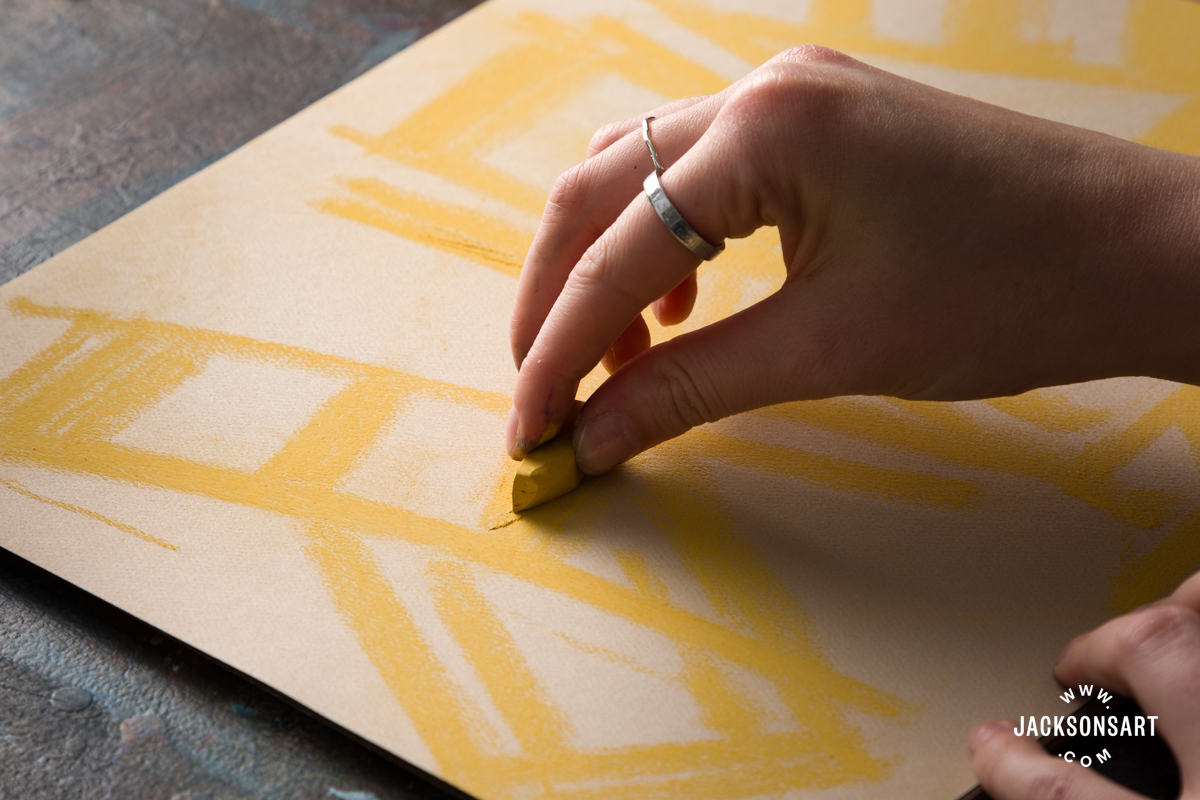
I added a background around the chairs in brown and purple.

I refined some of the shapes but left my blocking in broad and generalistic. No further detail was necessary to complete the blocking in stage.

Tips: When working with dry or dusty media like pastels or charcoal, you can change your work with a rubber, or lift some of the media off by dusting it away with a soft dry brush. You may not be able to get back to a perfectly clean surface, but often these methods are enough to continue working.
Further Reading
Underpainting in Oil and Acrylic
Three Plein Air Artists Test Jackson’s Professional Oil Paints
The History of Lead White Oil Paint and its Modern Alternatives
Composition Through Art History
Using Soft Pastels for Observational Drawing
Shop Art Materials on jacksonsart.com

The post The Blocking In Technique for Painting and Drawing appeared first on Jackson's Art Blog.
Trending Products